
I. Purpose & Scope
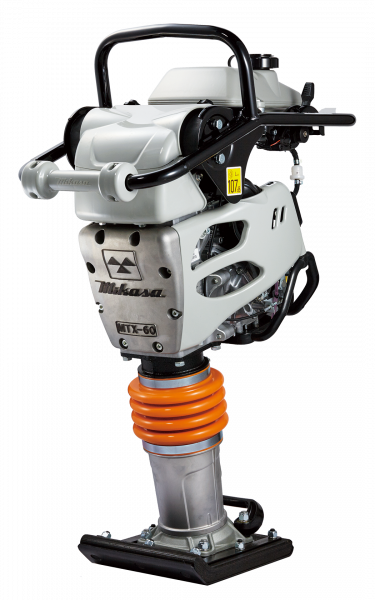
To safely and effectively provide instruction on the inspection and proper use of wacker rammers.
II. Definitions
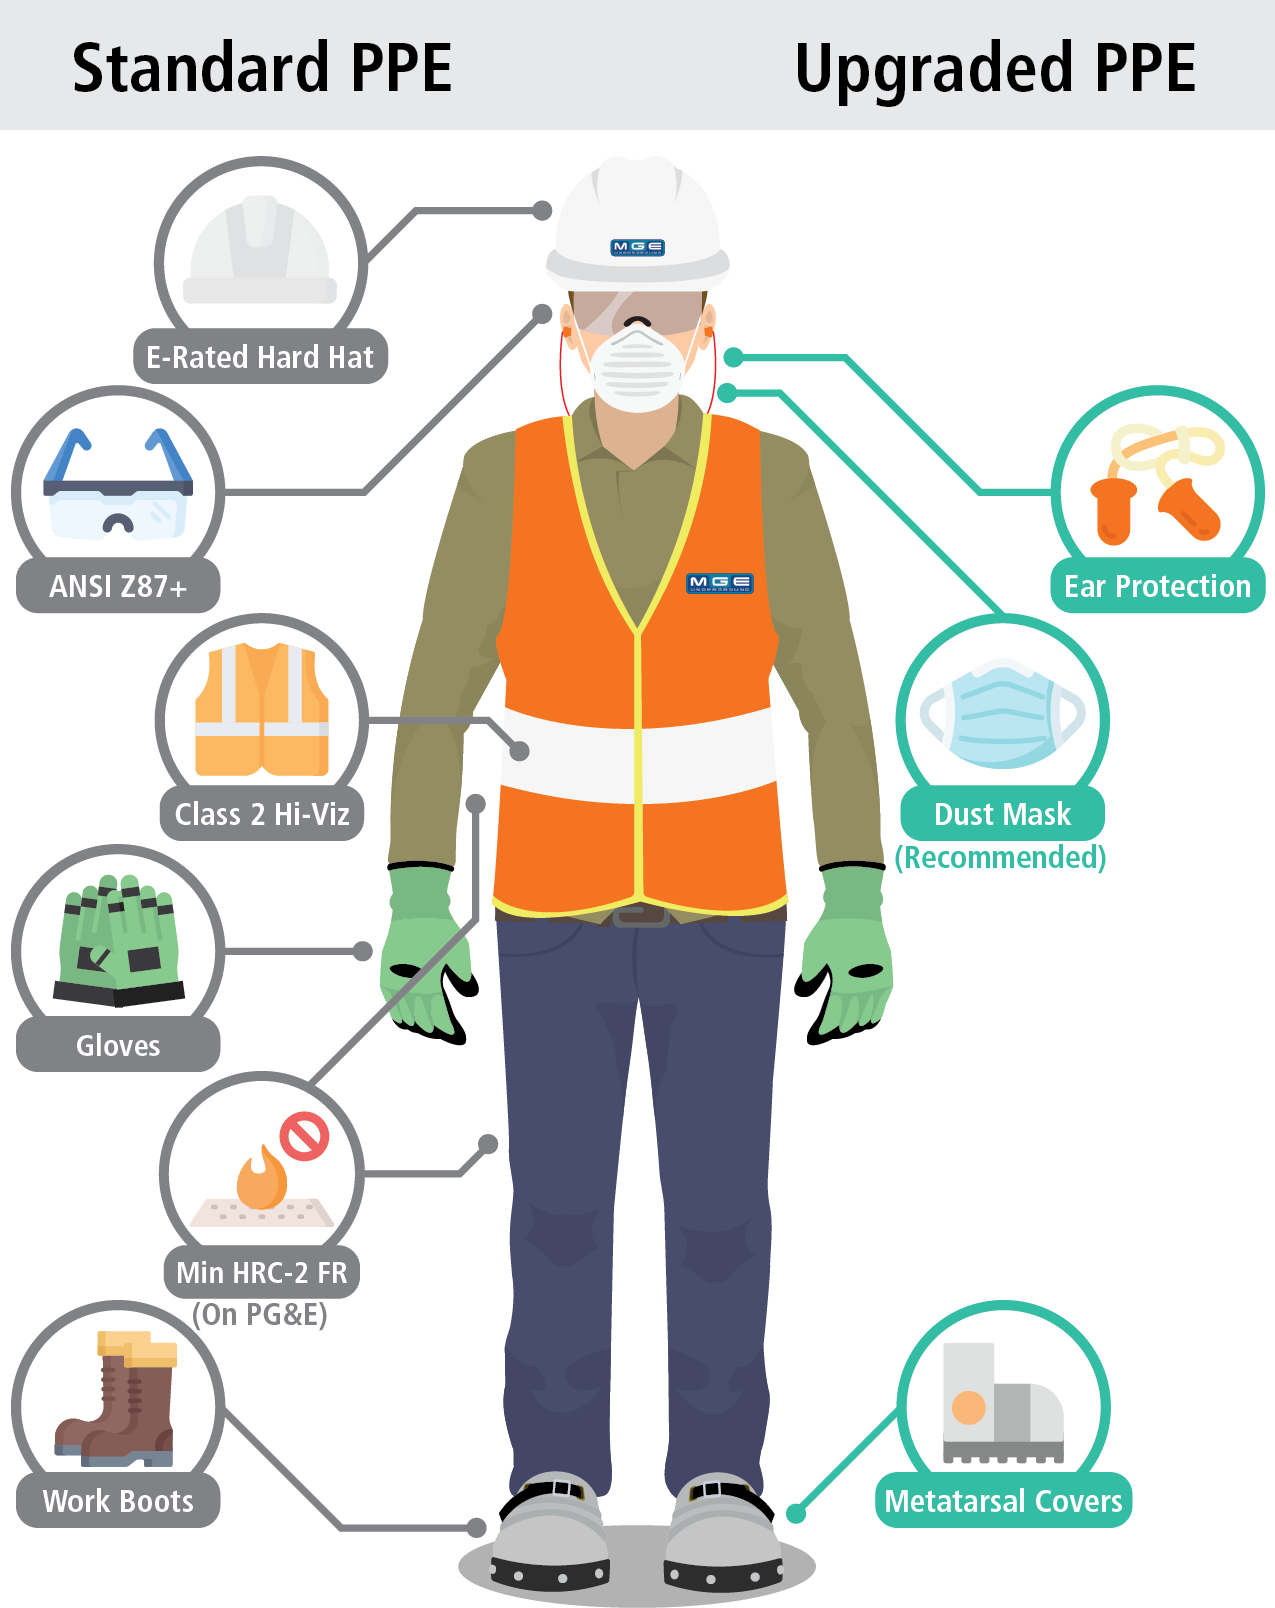
Standard PPE – High Viz Garments, Hard Hat, Z-87.1 Safety Glasses, Gloves, Pants, Work Boots
III. Process
NOTE: Work instruction does not supplement the manual. For specific instructions for the exact model please refer to the owner’s manual.
A. Potential Hazards
- Hazardous exhaust
- Fall hazards
- Fire and/or explosion hazard
- Burn Hazards
- Crushing hazards
- Flying object hazards
- Hearing hazards
B. PPE
- Standard PPE
- Metatarsal Protection
- Hearing protection
- Respiratory protection – Recommended
C. Inspection
- Inspect for loose screws and defective parts.
- Check for any damage on the machine.
- Check oil levels and for any contamination.
- Check shock rubber for damage, crack, fatigue, hardening, etc.
- Check for engine speed in idling and operation
- Check for any abnormal noise or jump during operation.
- Check the starter cable for tears or fraying.
D. Use
Initial Start Up
- Slide the throttle lever from the stop to the idle position. This opens the petcock and the engine electrical circuit is turned on automatically.
- Units with carburetor primer system: push the primer pump bulb four times to deliver fuel to the carburetor.
- Place the choke lever to the closed position. When the weather is cold, close the choke all the way. When it is hot, or if the engine is hot, open the choke a little or leave it fully open.
- Grip the starter rope handle and pull it until you feel a slight resistance. Then pull sharply and quickly. Return the handle to the starter case before releasing.
Operation
- To start the rammer tamping action, move the throttle lever quickly from idle to the start position. Do not move the throttle lever slowly as this may cause damage to the clutch or spring.
- To stop the tamping action, move throttle lever quickly from start to idle position.
Stopping the Engine
- Move throttle lever quickly from the start to idle position and run the engine for three minutes at low speed. After the engine cools, move the throttle lever to the stop position. The engine will stop and the fuel cock is automatically closed.
E. Maintenance
Daily
- Check the appearance for flaws, deformity, and dirt.
- Check the air cleaner for dirt, flaws and deformation.
- Check the bolts and nuts for loose or missing parts
- Check the handle for flaws, deformity, cracks and damage
- Check the rubber damper for wear, deformity, cracks and damage
- Check the engine oil for dirt and oil level
- Check the lubrication oil in the main body for dirt, and oil level.
- Check the fuel tank for leaks, fuel level and dirt.
- Check fuel system for leaks, wear and looseness.
- Wipe off any mud, dirt or oil from each component.
(Performed by Authorized Personnel Only)
Manufacturer: Mikasa
Model: MTX60
| Potential Energy Hazards | Method of Neutralizing Energy | Permits Required |
|---|---|---|
 Electric Air Electric Air |  LOTO Disconnect lines LOTO Disconnect lines | Safe work |
| Pneumatic Gravity | Block/bleed Release pressure | Hot work |
| Mechanical Gas | Set fire watch Confined space permit | Line blanking |
| Hydraulic Water | Confined space |
Lockout (Shut-Down Procedure)
- Notify all affected personnel.
- Move throttle lever into the stop position
- Place a lockout device to prevent movement of throttle.
- Place a tagout attached to the pull starter.
Star-up Procedure
- Notify all affected personnel that equipment is operational and removal of the lockout will occur.
- Remove all tools, equipment and debris from the area.
- Remove lockout device from throttle.
- Remove tagout from pull starter and test equipment.
(Performed by Authorized Personnel Only)
Manufacturer: Mikasa
Model: MTX70
| Potential Energy Hazards | Method of Neutralizing Energy | Permits Required |
|---|---|---|
| Electric Air | LOTO Disconnect lines | Safe work |
| Pneumatic Gravity | Block/bleed Release pressure | Hot work |
| Mechanical Gas | Set fire watch Confined space permit | Line blanking |
| Hydraulic Water | Confined space |
Lockout (Shut-Down Procedure)
- Notify all affected personnel.
- Move throttle lever into the stop position.
- Place a lockout device to prevent movement of throttle.
- Place a tagout attached to the pull starter.
Start-up Procedure
- Notify all affected personnel that equipment is operation and removal of lockout will occur.
- Remove all tools, equipment and debris from the area.
- Remove lockout device from throttle.
- Remove tagout from pull starter and test equipment.