
I. Purpose & Scope
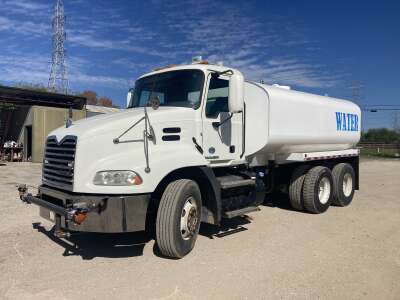
To safely and effectively provide instruction on the inspection and proper use of water trailers.
II. Definitions
Standard PPE – High Viz Garment, Hard Hat, Z-87.1 Safety Glasses, Gloves, Pants, Work Boots
III. Process
NOTE: Work instruction does not supplement the manual. For specific instructions for the exact model please refer to the owner’s manual.
A. Potential Hazards
- Lethal Exhaust Gas Hazards
- Explosive Fuel Hazards
- Burn Hazards
- Respiratory Hazards
- Accidental Starting Hazards
- Eye and Hearing Hazards
- Pressure Hazards
B. PPE
- Standard PPE
- Hearing Protection – Recommended
C. Inspection
- Check engine oil level.
- Place the unit on secure level ground with the engine stopped.
- Remove the filler dipstick form the engine oil filler hole and wipe it clean.
- Insert and remove the dipstick without screwing it into the filler neck. Check the oil level shown on the dipstick.
- If the oil level is low, fill to the edge of the oil filler hole with the recommended oil type.
- Check fuel level.
- Remove the gasoline cap located on top of fuel tank.
- Visually inspect to see if fuel level is low. If fuel is low, replenish with unleaded fuel.
- When refueling, be sure to use a strainer for filtration. Do not top-off fuel. Wipe up any spilled fuel.
- Check air cleaner
- Check all nuts and bolts.
D. Use
Starting the Engine
- Place the manifold control handle in the vertical position (OFF).
- Place the engine fuel valve lever to the ON position.
- Move the throttle lever away from the slow position, about 1/3 of the way toward the fast position.
- Place the choke lever in the CLOSED position if starting a cold engine.
- Place the chock lever in the OPEN position if starting a warm engine or the temperature is warm.
- Place the engine ON/OFF switch in the ON position.
- Grasp the starter grip and slowly pull it out. The resistance becomes the hardest at a certain position, corresponding to the compression point. Pull the start grip briskly and smoothly for starting.
- If the engine has started, and the chock lever was moved to the CLOSED position to start the engine, gradually move the choke lever to the OPEN position as the engine warms up. If the engine has not started repeat steps until engine starts.
- Before the water trailer is placed into operation, run the engine for several minutes.
- Check for fuel leaks and noises that would be associated with a loose component. Check for leaks between pump and engine. If water is leaking between the pump and engine housing, the seal inside the pump may be worn or damaged. Continued operation of the pump is not recommended. Further usage of the pump under these conditions may cause severe water damage to engine.
- To begin pumping, place the throttle lever in the RUN position.
- Set manifold and spray bar control handles to activate pumping.
Stopping the Engine
- Move the throttle lever to the IDLE position and run the engine for three minutes at low speed.
- After the engine cools, turn the engine ON/OFF switch to the OFF position.
- Place the fuel shut-off lever in the OFF position.
Emergency Shutdown
- Move the throttle lever quickly to the IDLE position, and place the engine ON/OFF switch in the OFF position.
Filling the Water Tank (Fire Hydrant)
- Remove the water tank cap.
- Attach hydrant adapter to fire hydrant if necessary.
- Attach fire hydrant discharge hose between the 2″ steel water tank pipe QD port and the fire hydrant.
- Make sure there are no bends or sharp kinks in the hose between the fire hydrant and water tank fill port.
- Slowly open the hydrant valve. Water tank should begin to fill.
- Fill the water tank to the desired level and close the fire hydrant valve.
- Remove fire hydrant discharge hose and allow the hose to drain. Remove the hydrant adapter.
Filling the Water Tank (Water Source)
- The following procedures show how to fill the water tank using a swimming pool, pond, lake, river etc. as a water sources.
- Remove the dust cap from the desired CAM and groove male QD port from the upper manifold.
- Connect suction hose between desired port (1.5″ or 2.0″) and water source.
- Place spray bar and manifold control handles in the suction position.
- Fill the water tank to the desired level.
- To stop water flow place manifold control handle in OFF position (vertical).
- Remove suction hose.
- Install dust cap back onto male QD port.
Garden Hose
- Connect garden hose between garden hose valve and water source.
- Open garden hose valve.
- Place spray bar and manifold control handles in suction position.
- Fill the water tank to the desired level.
- To stop water flow place manifold control handle in OFF position (vertical).
- Close garden hose valve.
- Remove garden hose.
Discharging Water
- Remove dust cap from the desired CAM and groove male QD port from the upper manifold.
- Place spray bar and manifold control handles in the discharge position.
Pump Vacuum Test
- Remove the pump fill cap and fill the pump with water.
- Start the engine and wait for the pump to being pumping.
- Place a water hose inside the discharge opening of the pump, and turn on the water. This flow of water into the discharge opening will prevent the pump from running dry.
- Place the Pump Vacuum Tester over the pump suction (inlet) opening with the vacuum gauge facing upwards. It may be necessary to apply a small amount of water around the rubber seal of the vacuum tester to make a good suction fit.
- Check and make sure that there are no air leaks between the vacuum tester and the inlet port on the pump. If air leaks are present reset vacuum tester.
- Run the pump for a few minutes while monitoring the vacuum gauge. If the gauge indicates a reading between -25 and -20 in Hg. (inches in mercury) then it can be assumed that the pump is working correctly.
- If the vacuum tester gauge indicates a reading below -20 in. Hg, it can be assumed that the pump is not functioning correctly, and corrective action needs to be taken.
E. Maintenance
- Thoroughly remove dirt and oil form the engine and control area.
- Clean or replace the air cleaner elements as necessary.
- Remove the air cleaner cover and foam filter element.
- Tap the paper filter element several times on a hard surface to remove dirt, or blow compressed air through the filter element form the air cleaner case side. NEVER brush of dirt.
- Clean foam element in warm, soapy water or non-flammable solvent.
- Rinse and dry thoroughly.
- Dip the element in clean engine oil and completely squeeze out the excess oil form the element before installing.
- Check and retighten all fasteners as necessary.
- Check the gearbox for oil leaks. Repair or replace as needed.