
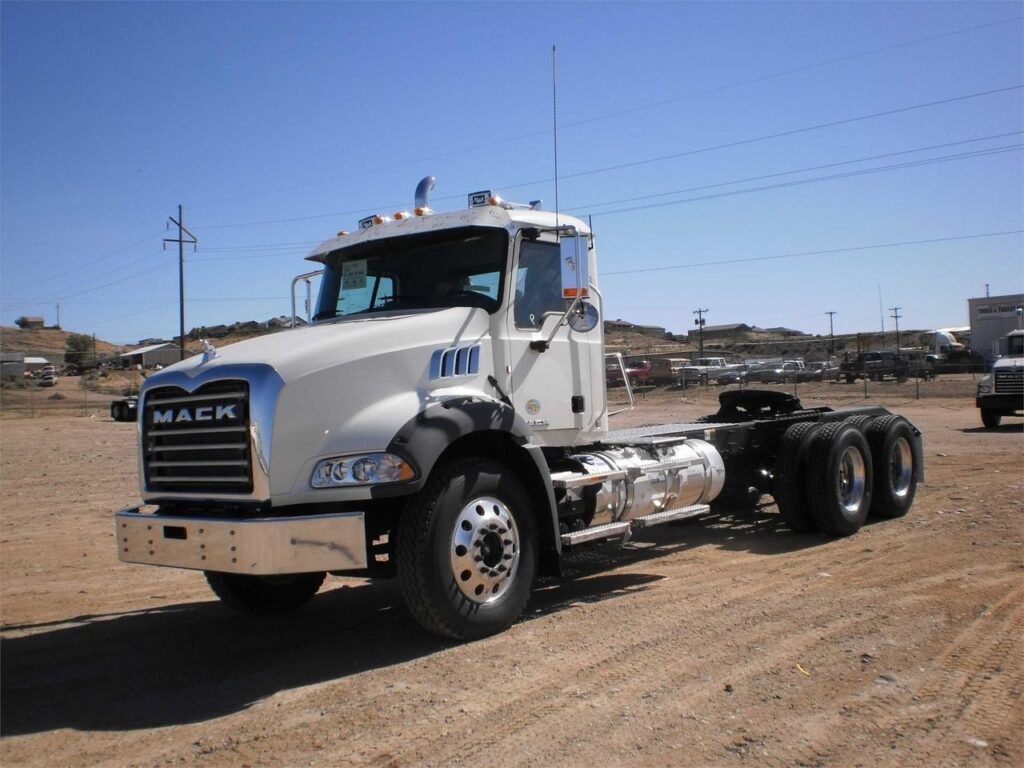
I. Purpose & Scope
To safely and effectively provide instruction on the inspection and proper use of trucks.
II. Definitions
Standard PPE – High Viz Garment, Hard Hat, Z-87.1 Safety Glasses, Gloves, Pants, Work Boots
III. Process
NOTE: Work instruction does not supplement the manual. For specific instructions for the exact model please refer to the owner’s manual.
A. Potential Hazards
- Fume Hazards
- Moving Parts Hazards
- Falling Hazard
- Fire or Explosion Hazard
B. PPE
- Standard PPE
C. Inspection
- Look at the wheels and cap nuts. Inspect them for evidence of cap nut looseness. Rust streaks form the cap nut ball seat are an indication of looseness.
- Look for cracks around the hand hole, stud hole and wheel. Look for broken studs, wheel damage or improperly seated lock rings.
- Inspect tires for bulges, cracks, cuts, penetrations and/or oil contamination.
- Check coolant level. Add fresh coolant as necessary.
- Check for cooling system leaks. Inspect hoses and clamps for leaks and condition. Tighten hose clamps to specifications.
- Check and record degree of antifreeze concentration. Add antifreeze as necessary to obtain required protection level.
- Perform required DVIR.
Engine Oil Level Check
- Measurement of the oil level must be taken on level ground.
- The best time to check oil level is while the engine is cold (prior to starting at the beginning of the work day, or after the vehicle has sat approximately 2 hours). At normal operating temperature, oil level can be checked 15 minutes after shut down.
- The level must be close to the full line (at least between the add and full lines) on the dipstick, but must not exceed the full line.
D. Use
Entering Vehicle
- With both feet firmly on the ground, grab the outside handhold with both hands or grab the outside handhold with one hand and grab the steering wheel or inside handhold (if equipped) with the other hand. Then raise one foot to the bottom step.
- Maintain a firm grip on the handholds and/or steering when and raise your other foot to the top step.
- While still gripping the handholds and/or steering wheel, raise on foot to the cab floor.
- Move one hand at a time to the steering when, inside handhold (if equipped) or cab interior. Bring the other foot inside the cab and sit down.
Exiting Vehicle
- With both hands gripping the steering wheel, inside handhold (if equipped) or cab interior, stand up and face the inside of the cab. Move one foot to the top step.
- Move one hand to the outside handhold and grip the steering wheel, inside handhold (if equipped), or cab interior with the other hand. With one foot firmly on the top step, lower the other foot to the bottom step.
- Maintain a firm grip on the handholds and/or steering wheel, and keep one foot firmly on the bottom step. Then lower the other foot to the ground.
- With both hands firmly gripping the handholds and/or steering wheel, lower the other foot to the ground.
Opening the Hood
- With the hood in the locked position, pull outward on the plastic handle and disengage with the locking tab from the hood latch.
- Swing the rubber strap up and out of the way.
- Repeat this procedure on the other side of the hood.
NOTE: When the hood is opened, the safety latch will drop down into the locked position. - Using the bulldog as a handle, pull on the hood to raise it over the engine. You may put one foot on the bumper if necessary.
- Pull steadily on the hood until it comes over the center and stops fully open.
Locking the Hood
- Safety latch must be released (reset) before the hood will close.
- With the hood down, set the rubber strap in position and force the locking discs into the hood latch.
- Push inward on the plastic handle to lock the rubber strap in place.
- Repeat this procedure on the other side of the hood.
Seat Belt Operation
- To fasten seat belt, pull clip so the belt crosses your should and lap and insert it into the buckle until an audible snap is heard.
- Make sure the clip is securely fastened into the buckle.
- To tighten the lap portion of the combination belt, pull upward on the should portion until the lap portion fits snugly. The belt should rest as low on your hips as possible.
- Press down on the button to release the belt.
Mirror Breakaway Strut
- To re-attach the strut to the mirror bracket, push mirror bracket forward, as far as it will go.
- Align end of strut with slot in receptacle.
- Pull bracket reward to snap strut in place. The strut head should be centered fore-aft in the receptacle.
Starting the Vehicle
- Before putting the key in the ignition switch, set the parking (spring) brake, disengage the clutch (if equipped) and put the transmission in neutral.
- Push Button Starters
- Put the key in the ignition switch. Turn the key clockwise to the first “click” (about the two o’clock position) to activate the instruments. Depress the starter button and release as soon as the engine starts. Keep the clutch (if equipped) disengaged until the engine runs smoothly.
- Air Starters
- On chassis equipped with an air starter, make sure that the air pressure gauge reads a maximum of 120 psi before shutting down and parking for the night. This will ensure sufficient air pressure for restarting the engine.
- Push Button Starters
- Crank the engine until it starts.
NOTE: Do not apply the throttle pedal during engine cranking. - After engine has started, warm the engine until the coolant temperature reaches normal operating range.
Priming the MP Fuel System
- Unlock the hand primer pump by pushing the pump handle in and turning it counterclockwise.
- Pump the hand primer until the force of pumping increases.
NOTE: When the fuel system is empty, 200 or more pump strokes may be needed to properly prime the system.
NOTE: There are no bleed nipples to be opened in order to prime the fuel system. - Lock the hand primer pump by retracting it into the housing and turning it clockwise.
- Start the engine and run it at an increased idle speed for approximately 5 minutes to remove any remaining air in the system.
- Check the fuel system for leaks.
Coupling a Trailer
- Position the tractor directly in front of the trailer.
- Back the trailer slowly until the fifth wheel just contact the trailer plate.
- Place the transmission in neutral and apply the parking brakes.
- Connect the trailer glad hands and electrical connector.
- Check that the fifth wheel height matches the height of the underside of the trailer.
- If the trailer is too high, use the landing gear to lower the trailer until fifth wheel and trailer height match.
- If the vehicle is equipped with an air suspension and the trailer is too low, use the air suspension control switch to exhaust air from the suspension air bangs until fifth wheel and trailer height match.
- Back under the trailer slowly until the trailer king pin engages. Back slowly to avoid hitting the king pin too hard, and stop as soon as the king pin is locked into the fifth wheel.
- If equipped with an air suspension, use the air suspension control switch to reinflate the suspension air bags.
- Raise the trailer landing gear slightly off the ground.
- With the trailer parking brakes applied, pull the tractor ahead slightly to ensure that the trailer is locked onto the tractor.
- Push the trailer air supply valve (red octagonal knob) in to supply the trailer system with air pressure. With the air system at normal operating pressure, check the trailer air brake system for excessive leakage and proper operation.
- Inspect the coupling to ensure the trailer is properly connected. Make sure there is no space between the fifth wheel and the trailer plate and that the fifth wheel jaws have closed around the shank of the king pin. Check that the locking lever is in the “lock” position and make sure the safety latch is in position over the locking lever.
- After ensuring that the trailer is properly connected, raise the landing gear to its maximum height.
- If wheel chocks were placed at the trailer wheels, remove the chocks and store.
Uncoupling a Trailer
- Park the tractor/trailer combination on a level surface. Make sure the parking surface will support the weight of the trailer, and make sure that the tractor is lined up straight with the trailer. Pulling out from under a trailer at an angle may damage the landing gear.
- Pull the trailer air supply valve (red octagonal knob) out to apply the trailer parking brakes.
- Back the tractor slightly to ease pressure on the fifth wheel jaws. Apply the tractor parking brakes while still backing against the king pin so the combination will be held with pressure off the fifth wheel jaws.
- Block the trailer wheels to prevent the trailer from moving.
- Lower the trailer landing gear until the gear makes firm contact with the ground.
- Disconnect the glad hands and the trailer electrical connector. Connect the glad hands to the dummy couplers at the back of the tractor and install the trailer electrical connector into the receptacle provided at the back of the cab.
- Unlock the fifth wheel.
- Pull the tractor ahead slightly (approximately twelve inches) so that the king pin disengages the fifth wheel jaws.
- If equipped with an air suspension, use the air control switch to exhaust the air form the suspension air bags.
- Pull the tractor ahead until the fifth wheel is out from under the trailer. Stop the tractor with frame under the trailer. This prevents the trailer from falling should the landing gear collapse or sink into the ground.
- Place the transmission in neutral and apply the parking brakes.
- Inspect the parked trailer to make sure the ground is supporting the trailer and the landing gear is not damaged.
- If equipped with an air suspension, use the air suspension control switch to reinflate the suspension air bags.
- Release the parking brakes and drive the tractor forward until the tractor is clear of trailer.
NOTE: If equipped with an air suspension, do not operate the vehicle with the suspension air bags deflated. Always reinflate the suspension air bags after coupling or uncoupling a trailer.
E. Maintenance
- Ensure fuel levels are appropriate to arrive at the required destination. Do not fill to more than 95% of liquid capacity.
- Do not misfill DEF in Diesel tank or Diesel in DEF tank.