
I. Purpose & Scope
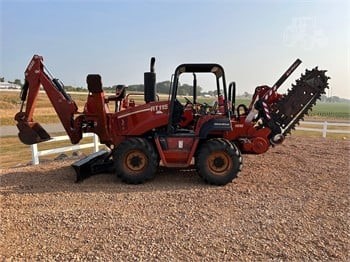
To safely and effectively provide instruction on the inspection and proper use of tractors.
II. Definitions
Standard PPE – High Viz Garment, Hard Hat, Z-87.1 Safety Glasses, Gloves, Pants, Work Boots
III. Process
NOTE: Work instruction does not supplement the manual. For specific instructions for the exact model please refer to the owner’s manual.
A. Potential Hazards
- Moving Parts Hazard
- Electric Shock Hazard
- Deadly Gases Hazard
- Crushing Weight Hazard
- Fall Hazard
- Rollover Hazard
- Fire and Explosion Hazard
- Stored Pressure Hazard
- Burn Hazard
- Flying Objects Hazard
- Noise Hazard
B. PPE
- Standard PPE
- Hearing Protection
C. Inspection
- Check general appearance of tractor and attachments. Look for loose, worn, or damaged parts and fluid leaks.
- Check condition of all wear items such as brake pads and disc, fan belts and light bulbs. Check condition of attachment wear items.
- Check fuel level.
- Check that all signs, guards, and shields are in place and readable.
Tractor
- Check engine oil
- Check air filter indicator and clean dust trap.
- Check water separators and fuel filters.
- Check hydraulic fluid.
- Check hydraulic reservoir fill and strainer
- Check hydraulic hoses
- Check coolant level
- Check hoses
- Check radiator fins
- Check tire pressure
- Check wheel lug nuts
Trencher
- Check trencher auger bolts
- Check digging chain teeth and bits
- Check digging chain
- Check trencher boom mounting bolts
- Check attachment mounting bolts
- Check personnel restraint bar bolts
- Check digging chain tension
Plow
- Check plow vibrator oil
- Check plow arm pins and bushings
- Check plow connector pivots
- Check attachment mounting bolts
Saw
- Check saw bits
- Check segments
- Check attachment mounting bolts.
D. Use
Lift
- Lifting points are identified by lifting point decals. Lifting at any other point is unsafe and can damage machinery.
- Tiedown points are identified by tiedown decals. Securing unit to trailer at any other points may be unsafe and can damage machinery.
- Attach tiedowns at front and rear tiedown points. Make sure tiedowns are tight before transporting unit.
Start Up
- Fasten and adjust seatbelt.
- Check that ground drive control and attachment speed/direction control are in neutral.
- Move throttle to idle.
- Check that parking brake is engaged.
- Turn ignition switch to start tractor. Warning alarm will sound. Indicators will light.
- Run engine at half-throttle or less for five minutes before operating tractor. During warm-up, check that all controls work properly.
Operation
- Turn on lights and warning flasher, as needed.
- Tilts steering wheel column down.
- Raise backfill blade and all attachments.
- Release parking brake and verify parking brake indicator is off.
- Move gearbox control to 2 (high).
- Adjust throttle.
- Move ground drive control to forward or reverse.
Shutdown
- When job is complete, move ground drive control to neutral.
- Tilt steering wheel column up.
- Engage parking brake and verify parking brake indicator is on.
- Lower all attachments to ground.
- Move throttle to idle for 3 minutes to cool.
- Turn ignition switch to STOP. If leaving machine unattended, remove key.
- For maintenance or long-term storage, turn battery disconnect switch to disconnect position.
Trencher Attachment
Set Up
- Fasten and adjust seat belt.
- Start tractor.
- Drive to starting point. Move in line with planned trench.
- Engage parking brake and verify parking brake indicator is on.
- Move gearbox control to 1 (low).
- Select low hydraulic motor speed.
- Lower backfill blade.
- Tilt steering wheel column up.
- Swivel seat to the work position.
- Engage axle lock.
- Lower boom to just above ground.
- Check that attachment speed/direction control is in neutral.
- Check that boom is in line with planned trench.
Operation
- If necessary, adjust throttle to low idle.
- Move attachment speed/direction control to desired speed. Digging chain will move.
- Lift trench cleaner, if equipped.
- Increase engine speed to full throttle.
- Slowly lower digging boom to depth.
- Raise backfill blade.
- Release parking brake and verify parking brake indicator is off.
- Move ground drive control to desired speed.
- If using optional trench cleaner, return ground drive control to neutral when desired trench depth is reached. Raise boom slightly, then lower trench cleaner completely. This ensures trench cleaner will lock in place.
- Lower boom to trench depth and push ground drive control forward to trenching speed.
- When trench is complete, move ground drive control to neutral.
- Adjust throttle to low idle.
- Raise boom.
- As boom clears top of trench, move attachment speed/direction control to neutral.
- Swivel seat to the drive position.
- Tilt steering wheel column down.
- Drive a short distance away from work site.
- Disengage axle lock by driving tractor is reverse 6 feet.
- Shut down tractor.
Cruise Control Operation
- Ensure ground drive control is in neutral.
- Ensure hydraulic motor switch is in low.
- Ensure gearbox control is in 1 (low).
- Ensure cruise control selector is in MANUAL.
- Ensure that all controls are set as desired.
- Move cruise control RPM control to arrow at center.
- Move cruise control selector to AUTO.
- When desired depth is reached, ensure throttle is fully open.
- Slowly move ground drive control to full forward position.
- Slowly adjust cruise control rpm control to match digging conditions. In harder digging conditions, higher cruise control rpm setting may improve digging performance. In easier digging conditions, lower cruise control rpm setting may increase ground drive speed.
- When finished digging, move ground drive control to neutral.
- Move cruise control selector to MANUAL.
- Allow chain to dig itself free before stopping attachment.
Backfilling
- Position unit at end of trench, several feel from spoils. Aim tractor at outer edge of spoils.
- Adjust backfill blade to fit land contour.
- Move outer edge of spoils toward trench. Take two or more passes at spoils rather than moving all spoils at once.
- Repeat on other side of trench, if necessary.
- Engage float and make final pass over trench.
Plow Attachment
Set up
- Fasten and adjust seat belt.
- Start tractor.
- Driver to starting point. Move in line with planned trench.
- Engage parking brake and verify parking brake indicator is on.
- Lower backfill blade.
- Lower plow to starting point of trench.
- Turn ignition switch to STOP.
- Attach material being pulled or fed.
- Pull:
- Insert material into pulling grip.
- Tape grip with duct tape.
- Feed:
- Remove cable guide.
- Feed cable through tube from top to bottom.
- Replace cable guide and tighten fasteners.
- Secure cable.
- Pull:
Operation
- Fasten and adjust seat belt.
- Start tractor.
- Adjust throttle to low idle.
- Check that ground drive control is in neutral.
- Release parking brake and verify parking brake indicator is off.
- Move gearbox control to 1 (low).
- Lower reel carrier to lowest position possible, if equipped.
- Raise backfill blade.
- Tilt steering wheel column up.
- Swivel seat to the work position.
- Engage axle lock.
- Move ground drive control forward to plowing speed and lower plow blade into ground.
- Move plow lift control to float.
- Move plow swing control to float.
- Increase engine speed to full throttle.
- Move attachment speed/direction control to full speed forward. Plow will vibrate.
- Reduce attachment speed to a point with the least tractor vibration and the highest ground drive speed possible without tire slippage.
- Adjust vibrator speed if ROPS vibrates excessively.
- When installation is complete, move plow swing to neutral.
- With vibrator running, raise plow to ground level.
- Move attachment speed/direction control to neutral.
- Swivel seat to the drive position.
- Engage parking brake and verify parking brake indicator is on.
- Lower backfill blade.
- Turn ignition switch to STOP and remove product from plow.
- Tilt steering wheel column down, start tractor and drive a short distance away from work site.
- Disengage axle lock by driving tractor in reverse 6 feet.
- Shut down tractor.
Reel Winder Attachment
Set up
- Lower reel carrier.
- Turn off engine.
- Remove reel.
- Remove lever arm.
- While supporting lever arm, remove bolt that attaches hydraulic lift cylinder to lever arm.
- For 2ft to 5ft diameter reels, rotate lever arm back and attach cylinder rod to bottom cylinder mounting hole.
- For 5ft to 7ft diameter reels, rotate lever arm back and attach cylinder rod to top cylinder mounting hole.
Operation
- Drive to beginning of planned plow path.
- Engage parking brake.
- Lower backfill blade.
- Lower plow attachment.
- Adjust throttle.
- Attach service line to reel.
- Move reel winder selector switch to activate reel winder control functions.
- Lower reel winder arm until tire meets reel flange.
- Wind service line.
- When finished winding, raise reel winder arm.
- Adjust throttle.
- Move reel winder selector switch to activate backfill blade controls.
- Raise backfill blade.
- Release parking brake.
Saw Attachment
Set Up
- Fasten and adjust seat belt.
- Start tractor.
- Drive to starting point. Move in line with planned trench.
- Engage parking brake and verify parking brake indicator is on.
- Move gearbox control to 1 (low).
- Tilt steering wheel column up.
- Swivel seat to the work position.
- Engage axle lock.
- Lower saw to just above ground.
- Lower stabilizers until distance from bottom of skid shoe to bottom of saw bits equals desired trench depth.
- Check that saw is in line with planned trench and that tires are pointing straight ahead.
Operation
- Adjust throttle to low idle.
- Move attachment speed/direction control to desired speed. Saw will turn.
- Slowly lower saw to trench depth.
- Release parking brake and verify parking brake indicator is off.
- Increase engine speed to full throttle.
- Push ground drive control forward to trenching speed.
- When trench is complete, adjust throttle to low idle.
- Raise saw and stabilizers. As saw clears top of trench, move attachment speed/direction control to neutral.
- Swivel seat to the drive position.
- Tilt steering wheel column down.
- Drive a short distance away from work site.
- Disengage axle lock. Drive tractor in reverse 6 feet while turning steering wheel left to right to fully disengage axle lock.
- Shut down tractor.
Backhoe Attachment
Set Up
- Move attachment speed/direction control to neutral position.
- Apply service brake.
- Move ground drive control to neutral position.
- Shift gearbox control to 1 (low).
- Lower rear attachment to 6 inches above ground.
- Check that backfill blade is straight and lower it to ground.
- Decrease engine speed to low throttle.
- Move to backhoe operator’s station.
- Lower stabilizers enough to lift front tires.
- Remove swing lock pin from hole 1 and store in hole 2.
- Raise boom to release tension on stow lock.
- Release stow lock by pushing handle forward.
- Adjust engine speed to 1/2 to 3/4 throttle for digging.
Operation
- Use boom/swing control and bucket/dipper control to dig hole or trench.
- Keep dipper and boom at right angles as much as possible for maximum power.
- Keep bucket in line with dipper as much as possible.
- Position bucket so teeth cut soil. As soil is cut, curl bucket under dipper.
- Move dipper and bucket together. Increasing engine speed will not increase backhoe force.
Stow
- When hole or trench is complete, lift boom while keeping dipper pointed at ground.
- Curl bucket closed and move dipper fully toward boom.
- Lift boom to highest position and latch stow lock.
- Lower boom slightly to engage lock.
- Engage swing lock.
- Raise stabilizers.
- Return remove throttle to low idle.
Drilling Attachment
Drill
- Start tractor’s engine and begin clockwise (forward) rotation.
- Slowly advance tractor while maintaining clockwise rotation.
Drill String Guide
- Use only approved drill string guide.
- Stand only to the left side of the approach trench.
- Keep drill string guide at least 3 feet behind bit.
- Use drill string guide to control only the first 5 feel of the bore path.
- After drilling 5 feet, stop unit and remove drill string guide.
- Do no use drill string guide during backreaming or any time the drill string is being pulled back.
Add Rod
- Stop drilling attachment.
- Back up tractor 6 inches to loosen drill rod in ground.
- Disconnect drill rod from drilling attachment.
- Move tractor away form bore.
- Add one drill rod to continue bore.
Backream
- Turn tractor ignition switch to STOP.
- Replace drill bit with backreamer.
- Start tractor engine and begin clockwise rotation.
- Slowly back up tractor while maintaining rotation.
- When backreamer exits the bore hole, stop rotation immediately.
Disassemble Joints
- Press tab through hole in female side of joint using special tool or screwdriver.
- Pull rods apart.
E. Maintenance
Tractor
- Clean radiator fins as needed
Trencher
- Lube trencher tail roller
- Lube trencher pivot
- Lube trencher auger bearings
- Lube trencher auger shaft
- Replace digging chain as needed
Plow
- Lube plow pivots
- Clean feed tube as needed.
- Replace sod cutter and blade as needed.
- Check plow blade bolts as needed.
Saw
- Clean saw
- Clean spoil chutes
- Lube saw wheel shaft bearings
- Replace saw bits as needed.
- Replace saw segments as needed.
- Check saw segment bolts as needed.
- Hard surface saw segments and war bars as needed.
Backhoe
- Replace pins and bushings as needed.
F. Live Line Contact
- Immediately stop work.
- Treat equipment, attachments and ground as energized.
- Warn people nearby that an electric strike has occurred.
- DO NOT exit equipment and stay inside cab while contact or arcing is occurring.
- Ensure equipment is barricaded.
- If there is an immediate hazard (i.e. fire hazard) that requires the exiting of equipment employee shall jump out of equipment with both feet together, landing on the ground.
- Employee shall than shuffle away from equipment, not walk or run, taking small steps and feet together to minimize voltage difference in the ground until they reach a safe location.