
I. Purpose & Scope
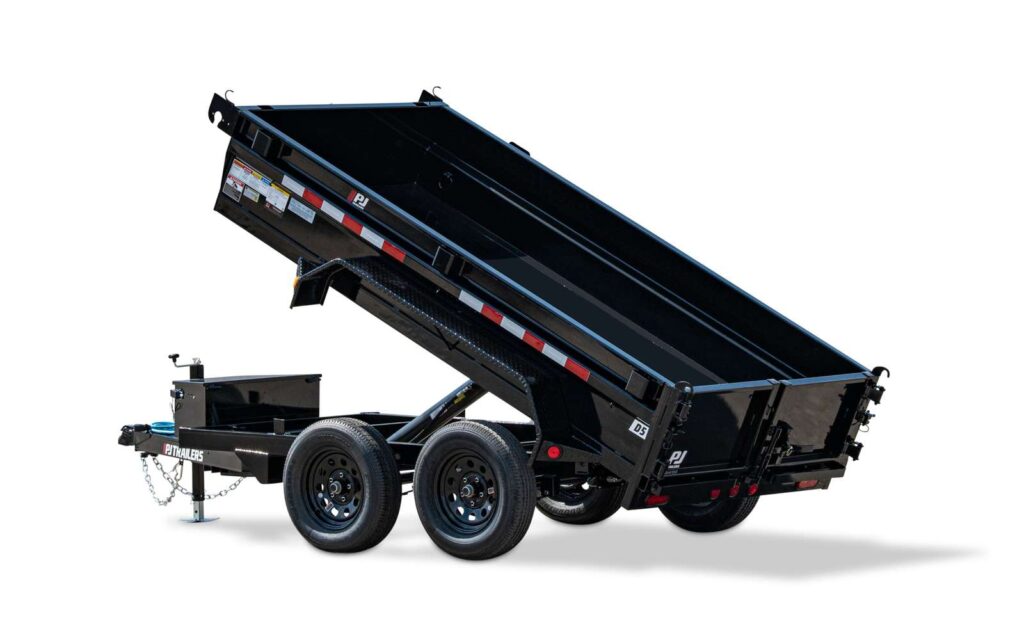
To safely and effectively provide instruction on the inspection and proper use of dump body and flatbed trailers.
II. Definitions
Standard PPE – High Viz Garment, Hard Hat, Z-87.1 Safety Glasses, Gloves, Pants, Work Boots
III. Process
NOTE: Work instruction does not supplement the manual. For specific instructions for the exact model please refer to the owner’s manual.
A. Potential Hazards
- Crushing Hazard
- Hydraulics Under Pressure Hazard
- Swing Radius Hazard
B. PPE
- Standard PPE
C. Inspection
- Observe the hitch for wear, corrosion and cracks before coupling. Replace worn, corroded or cracked hitch components before coupling the trailer to the tow vehicle.
- Check tires and wheels, trailer brakes, breakaway switch is connected to the tow vehicle, load is secured to the trailer and trailer lights are connected and checked.
- Check operation and fluid level of breakaway brakes.
- Check the breakaway battery is fully charged and connections are clean.
- Check operation of all brakes.
- Hourly, make regular stops to confirm that:
- The coupler is secure to the hitch and is locked.
- Electrical connectors are made.
- There is appropriate slack in the safety chains.
- There is appropriate slack in the breakaway switch pullpin cable.
- The tires are not visibly low on pressure.
- The cargo is secure and in good condition.
- Ball Hitch Coupler Inspection
- Wipe the hitch ball clean and inspect it visually and by feel for flat spots, cracks and pits.
- Rock the ball to make sure it is tight to the hitch, and visually check that the hitch ball nut is solid against the lock washer and hitch frame.
- Wipe the inside and outside of the coupler clean and inspect it visually for cracks and deformations; feel the inside of the coupler for worn spots and pits.
- Be sure the coupler is tight to the tongue of the trailer. All coupler fasteners must be visibly solid against the trailer frame.
- Raise the bottom surface of the coupler to be above the top of the hitch ball.
- Pintle Hitch Coupler Inspection
- Wipe the pintle clean and inspect it visually and by feel for flat spots, cracks and pits.
- Rock the pintle to make sure that it is tight to the hitch, and visually check that the pintle fasteners are solid against the hitch frame.
- Wipe the inside and outside of the ring clean and inspect it visually for cracks and deformations; feel the inside of the ring for worn spots and pits.
- Be sure the right is tight to the tongue of the trailer. All ring fasteners must be visibly solid against the trailer frame.
- Raise the bottom surface of the ring to be above the top of the open pintle.
- Visually inspect the safety chains and hooks for wear or damage. Replace worn or damaged safety chains and hooks before towing.
- Check tire pressure when cold and inflate as needed.
- Check for lug nut and hub tightness. Tighten as needed.
D. Use
Ball Hitch Coupler
Prepare the Coupler and Hitch
- Lubricate the hitch ball and the inside of the coupler with a thin layer of automotive bearing grease.
- Remove the safety latch pin and open the coupler locking mechanism.
- In the open position, the coupler is able to drop fully onto the hitch ball.
- Slowly back up the tow vehicle so that the hitch ball is near or aligned under the coupler.
Couple the Trailer to the Tow Vehicle
- Lower the trailer tongue until the coupler fully engages the hitch ball. If the coupler does not line up with the hitch ball, adjust the position of the tow vehicle.
- Engage the coupler locking mechanism. In the engaged position, the locking mechanism securely holds the coupler to the hitch ball.
- Insert the safety lock pin through the hole in the locking mechanism.
- Be sure the coupler is all the way on the hitch ball and the locking mechanism is engaged. A properly engaged locking mechanism will allow the coupler to raise the rear of the tow vehicle. Using the trailer jack, test to see that you can raise the rear of the tow vehicle by 1 inch, after the coupler is locked to the hitch.
- Lower the trailer so that its entire tongue weight is held by the hitch, and continue retracting the jack to its fully retraced position.
- Fully retract the jack drop leg and insert pin.
Rig the Chains
- Visually inspect the safety chains and hooks for wear or damage. Replace worn or damaged safety chains and hooks before towing.
Pintle Coupler
Prepare the Ring and Pintle
- Lubricate the inside of the pintle with a thin layer of automotive bearing grease.
- Remove the safety latch pin and open the pintle locking mechanism.
- In the open position, the ring is able to drop fully onto the pintle.
- Slowly back up the tow vehicle so that the pintle is near or aligned under the ring.
Coupling to Tow Vehicle
- Lower the trailer tongue until the ring fully engages the pintle. If the ring does not line up with the pintle, adjust the position of the tow vehicle.
- Engage the pintle locking mechanism. In the engaged position, the locking mechanism securely holds the ring to the pintle.
- Insert the safety lock pin through the hole in the locking mechanism.
- Be sure the ring is all the way on the pintle and the locking mechanism is engaged. A properly engaged locking mechanism will allow the pintle to raise the rear of the tow vehicle. Using the trailer jack, test to see that you can raise the rear of the tow vehicle by 1 inch, after the coupler is locked to the hitch.
- Lower the trailer so that its entire tongue weight is held by the hitch, and continue retracting the jack to its fully retraced position.
- Fully retract jack drop leg and insert pin.
Loading Fixed Loads Dump Trailer
- Couple the trailer to the tow vehicle.
- Park the tow vehicle and trailer on a firm and level surface, both front-to-back and side-to-side.
- Inspect the “D” rings for any cracks.
- Clear the area around the trailer.
- Place blocking under the rear of the trailer so the weight of the cargo does not raise the front of the trailer during loading.
- Open rear swing gates and secure open.
- Remove safety lock pins, open covers and pull ramps from storage position.
- Place bracket on ramps over bracket trailer.
- Place the ramps at the proper width and load the equipment.
- Secure the cargo to the trailer using appropriate straps, chains and tensioning devices.
- Remove ramps and place in storage position. Close ramp covers and be certain to install safety lock pins on ramp covers.
- Close and secure rear doors.
- Remove blocking under rear of trailer.
Loading Bulk Material Dump Trailer
- Couple the trailer to the tow vehicle.
- Park the trailer and tow vehicle on a firm and level surface, both side-to-side and front-to-rear.
- Check the dump body for damage. Repair before loading trailer.
- Close and latch trailer gates.
- Level (evenly distribute) the load within the trailer from front to back and from side to side. Do not exceed the GVWR and overload trailer.
- If material may blow out while driving, tarp the trailer.
- If the trailer is overloaded, DO NOT attempt to raise the dump body. The excess material must be remover by equipment designed for this purpose, or by hand.
Unload Bulk Material Spreader Gate
- Set the metering chains at the desired number of links to control the opening distance of the spreader gate. Be sure to set both chains at equal length. Push down on lever to unlock spreader gate.
- Open the battery box and locate the dump body controller. While using the dump body controller, position yourself in a safe location clear of the dump body. Check for overhead power lines and other obstructions before raising the dump body.
- Press and hold the up button to raise the dump body. Release the button when the body has reached approximately the halfway point of its dumping angle, or if the load begins to shift rearward. Never leave the dump body control when operating the dump body.
- Return the dump body control to the battery box. Watch for and avoid obstructions such as tree limbs, overhead lines, potholes etc. and slowly drive the tow vehicle and trailer ahead to spread the material.
- Do not driver forward and stop quickly to “shock” the load out of the body. Do not “jerk” the control button up and down to dislodge the load. The proper procedure for a stuck load is to fully lower the dump and dislodge the material by hand.
- You may need to raise the dump body higher after a portion of the load has been spread to place the remaining material at the rear of the dump body.
- Stop tow vehicle after all material has exited the dump body.
- Press and hold the down button to lower the dump body. Release the button when the dump body is fully lowered. Place dump body controller in the storage or travel location. Close and lock battery box.
- Close and lock rear gate before moving trailer.
Unload Bulk Material Swing Gates
- Remove safety lock pin, pull up on the gate latch to release swing gates. Lock gates against the side of trailer.
- Open the battery box and locate the dump body controller. While using the dump body controller, position yourself in a safe location clear of the dump body. Check for overhead power lines and other obstructions before raising dump body.
- Stand well clear of the dump body in a safe location, push and hold the up button on the the control until the dump body reaches approximately the halfway point of its dumping angle. Never leave the control when operating the dump body.
- Discontinue pushing the up button and walk to the rear of the trailer so you can estimate if there is enough space for the remainder of the load to be safely dumped. If not, then you need to fully lower the dump body by pushing and holding the down button and then pull the trailer forward and then repeat the previous step.
- Standing well clear of the dump body, raise the dump body to the three quarter point of the maximum dump angle. Discontinue pushing the up button and walk to the rear of the trailer to check to see if there is enough space for continued dumping.
- Repeat the process until the load has been completely dumped.
- If the load has not completely dumped DO NOT drive forward and stop quickly to “shock” the load out of the body. Also DO NOT “jerk” the control button up and down to dislodge the load. The proper procedure for a stuck load is to lower the dump and dislodge the material by hand.
- Press and hold the down button to lower the dump body.
- Release the button when the dump body is fully lowered. Place dump body control in the storage or travel location. Close and lock battery box.
- Close and lock rear doors before moving the trailer.
Hydraulically Operated Dovetail
- To lower the dovetail, open the box and locate the control. Press “UP” to move the dovetail off of the mechanical stops.
- Move mechanical stop handle clockwise to move mechanical stops off of cylinder.
- Press “OUT” to move the dovetail ramp out.
- Press “DN” to lower the dovetail.
- To raise dovetail, Press “UP” to raise dovetail.
- Press “IN” to move the dovetail ramp inward.
- Move the mechanical stop lever counter clockwise until lever is horizontal.
- Press “DN” to lower the dovetail against mechanical stops.
- Place control in box, close and lock cover.
Fold Down Ramps
- To lower ramps, remove safety lock pins, support straps and lower ramps.
- Straps and safety lock pins must be installed before towing trailer.
Spring Loaded Ramps
- Lower the ramps and position as needed to load or unload trailer.
Mesh Ramps
- To lower ramps, remove safety lock pins, support straps and lower ramps.
- Straps and safety lock pins must be installed or the ramps must be folded over flat against the trailer deck before towing trailer.
Removable Ramps
- To install ramps, remove safety lock pins, open covers and pull ramps out.
- Place angle bracket on ramps, in channel on trailer.
- Adjust ramp width as needed to load and unload trailer.
E. Maintenance
- Body Prop provided is only to be used for LOTO and not for supporting a loaded dump body.
- Remove dirt and debris paying special attention to locking pins, swing doors, and hitches.