
I. Purpose & Scope
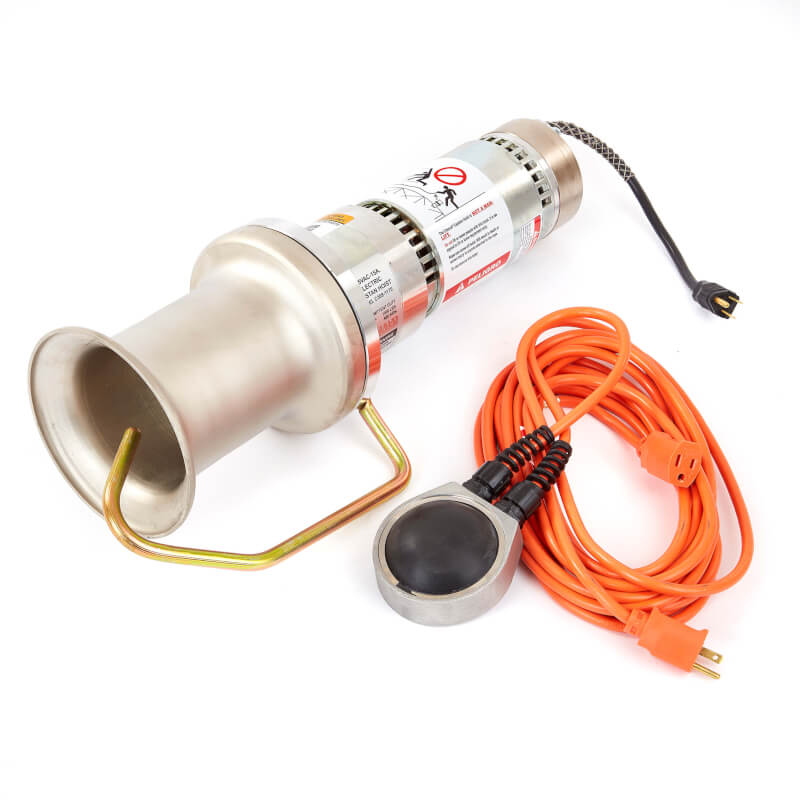
To safely and effectively provide instruction on the inspection and proper use of the Capstan Hoist.
II. Definitions
Standard PPE – High Viz top, E rated hard hat, Z-87.1 Safety Glasses, Pants, Gloves, Work Boots
III. Process
NOTE: Work instruction does not supplement the manual. For specific instructions for the exact model please refer to the owner’s manual.
A. Potential Hazards
- Falling hazards
- Pinch hazards
B. PPE
- Standard PPE
C. Inspection
- Inspect the drum to ensure it is bolted securely into place.
- Inspect the drum plating and surface condition for damage. The drum surface should be completely smooth, exhibit no grooving, free of dents and raised imperfections that would cause abrasive damage to the rope. The drum plating should be fully intact and free of rust.
- Inspect the drum edges for dents, which may suggest that the hoist has been dropped or abruptly impacted. Such wear can lead to the damage of other hoist components.
- Ensure the drum is secure to the motor, rotates in only one direction and does not have backlash.
- Inspect the rope hook to ensure it is present and bolted securely in place over the top of the drum and loops into the end of the drum.
- Inspect the foot control to ensure it is free of nicks, kinks and bends.
- Inspect the foot control end fittings and connections to ensure they are securely tightened into position.
- Test the foot control switch under a no-load condition to ensure smooth and proper on/off operation.
- Inspect the power cord and plug for cuts or fraying.
- Confirm the power cord is securely mounted to the motor and not pulled loose. The cord is not a handle for carrying the hoist.
- Confirm the ground prongs on the power cord are in place and not damaged.
- Do not cut or remove the power cord grounding prong. Use only 3-wire power cords with the grounding prong and socket intact.
- Inspect all cords, plugs, etc. for proper size. Undersized cords increases current draw and will damage the electric motor.
- Inspect the electric motor for any external damage. Dents to the electric motor may suggest that the hoist has been dropped or abruptly impacted. Such wear can lead to the damage of other internal hoist components, especially the brushes, magnets and the rotor.
- Test the electric motor under a no-load condition to observe for excessive sparking, arcing, grinding, crackling, hitting or stalling. The hoist should run smoothly.
- Inspect the gas motor for any external damage. Dents and broken parts on the gas engine may suggest that the hoist has been dropped or abruptly impacted. Such wear can lead to the damage of other hoist components.
- Inspect and clean the gas engine thoroughly to remove dirt and debris from the cylinder area and carburetor to prevent overheating.
- Inspect and clean as necessary the air cleaner element in hot water and soap. Do not use gasoline or solvents for cleaning. Blow dry with air.
- Inspect for and repair any fuel leaks.
- Inspect for loose or missing fasteners and tighten or replace as necessary.
- Inspect oil level in the gas engine crankcase per the supplied engine manual.
- Inspect, gap and/or replace the spark plug as necessary.
- Inspect and clean the fuel filter as necessary.
- Remove any carbon deposits from the muffler and exhaust port.
- Inspect throttle cable and foot control for proper operation.
- Inspect the gearbox for any external damage. Dents to the gearbox may suggest that the hoist has been dropped or abruptly impacted. Such wear can lead to the damage or other hoist components.
- Inspect the gearbox for any fluid leaks around the mounting flange, beneath the drum or from the motor.
- Test the capstan hoist under a no-load condition to observe the gearbox for excessive grinding, hitting and/or vibration.
- Inspect the capstan hoist labeling to ensure it is present and readable. Replacement labels can be obtained from the manufacturer.
D. Use
- Mount the bracket so the load pulls the bracket against, instead of away from, the mounting location. Always mount the hoist to the proper bracket using bolts and fasteners supplied with the bracket. If bolts or fasteners are damaged or missing, replace them with grade 5 hardware.
- Fasteners must be tightened evenly to the proper torque to ensure “load sharing” by all the fasteners.
- After the hoist has been mounted in the desired location, connect the appropriate power supply to the hoist.
- Mounting on a Pole
- Remove the bolts in chain tubes (at wheel-tensioner end) to allow tubes to pivot. Prior to mounting the hoist, open the binder all the way by turning wheel-tensioner counter-clockwise.
- Drape the top chain over the capstan drum, hold the hoist against the pole with the upper leg. This leaves both hands free to grasp the top chain and extend it forward around the pole as if hugging it. Exchange the chain from hand to hand behind the pole so the chains can be hooked into the slots on the bracket.
- The hoist is securely held to a pole, tree, or other object by a screw-type binder. After hooking the chain, turn the binders clockwise to secure the hoist. After heavy initial loading, it may be necessary to again tighten the binders by taking additional turns on the wheel tensioners.
- Mounting on Tower or Beam
- Be sure the two bolts (at wheel-tightener end of chain binders) are secured in place through binders and bracket. This forms a 90 degree shoulder between the chain binders and the bracket base for mounting the hoist to a square-cornered member. This is the only difference from the above steps in the pole-mounting procedures.
- Mounting on Vehicle Receiver
- The optional hitch mount with swivel base for 1,000 lb electric models allows the operator to properly align the load without repositioning the service vehicle. It also gives the operator line of sight and helps with communication with other personnel.
- Mounting on a Pole
- After the hoist, bracket and foot control are properly mounted into position, you are ready to start lifting or pulling. Bring the rope from the load through the necessary blocks and to the capstan drum. Wrap the pulling rope around the drum in this direction starting with the load line nearest the motor end of the drum.
- It is important to use the proper number of rope turns. Many variables (such as the load to be raised, amount of mechanical advantage in the tackle, size, and age of rope) affect the number of turns. With the proper number of wraps, a slight (approximately 20-lb.) pull should raise or lower a load. Adding wraps decreases the amount of pull required to control the load. Removing wraps increases the amount of pull required.
- Lifting the load or pulling cable is a simple matter of starting the hoist by stepping on the foot control and applying pull to the fall line. Continue a steady pull, hand over hand, to complete the lift. When the load is near the final point, slow down on the fall line pull to ease the load into position. Once the load is in place, lifting your foot from the foot control stops the hoist.
- If the load needs to be lowered, simply allow the rope to slip back around the drum slowly, allowing the operator to lower the load safely and in full control. Ensure the load is clear of obstructions or energized lines prior to starting capstan.
- To pull a load, lay out your rope so the load will not hang up or dig in while you are pulling the load. Try to attach the rope in such a manner so the front end of the load is pulled. Do not attempt to pull down or through an obstruction, such as when a load is being pulled up a slope or ramp and then over a break. If the rope is dragging on the ground when the load is being pulled, the rigging is not correct. Do not pull a load down a slope towards your location. The load could slide and you could not stop it.
- After hoisting remove your foot from the foot control to stop the hoist. Secure the load. Once the load is in position, be sure to maintain tension on the rope while the load is secured. Check mount before hoisting the next load. It may be necessary to re-tighten the binder chains or align hoist again. Disconnect foot control after final load is secure. Disconnect the foot control from the hoist. Hoisting operations are now complete.
E. Maintenance
No maintenance required for this tool.