
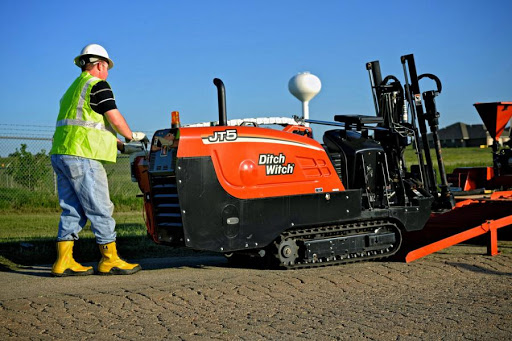
(Performed by Authorized Personnel Only)
Manufacturer: Ditch Witch
Model: JT922
| Potential Energy Hazards |  Electric Air Electric Air | Pneumatic Gravity Gravity | Mechanical Gas | Hydraulic Water |
| Method of Neutralizing Energy | LOTO Disconnect Lines | Block/Bleed Release pressure | Set Fire Watch Confined space permit | |
| Permits Required | Safe Work | Hot Work | Line Blanking | Confined Space |
Lockout (Shut-Down Procedure)
Working Under Drilling Unit
- Notify all affected personnel.
- Park machine on a hard level surface.
- Remove cylinder locks from storage at rear of the pipe box and place overextended cylinder rods with curved ends toward stabilizer shoes.
- Remove drill frame support stored at the rear of the unit and place under drill frame.
- Lower drill frame until the load is supported by drill frame support. Place tagout as close to drilling frame support as possible.
- Replace cylinder locks or drill frame support if damaged.
Opening Front Hood
- Notify all affected personnel that equipment is operational and removal of lockout will occur.
- Remove all tools, equipment, and debris from the area.
- Raise drill frame until the load is no longer supported by drill frame support and remove Tagout from the drill frame.
- Replace drill frame support at the rear of the unit.
- Remove cylinder locks from extended cylinder rods and place back into storage and remove Tagout device.
- Test equipment.
Start-Up Procedure
Working Under Drilling Unit
- Notify all affected personnel that equipment is operational and removal of lock out will occur.
- Remove all tools, equipment and debris from the area.
- Raise stabilizer until load is unsupported by cylinder.
- Remove yellow cylinder lock and place back in storage and remove tagout device.
Closing Front Hood
- Notify all affected personnel that equipment is operational and removal of lock out will occur.
- Remove all tools, equipment and debris from the area.
- Disengage the up-latch by holding it up as the hood is pulled outward using the lower handle.
- Pull outward on the hood until it begins to move downward.
- Place other hand on top of outer surface of hood and firmly push downward and inward until hood is completely closed, latch upper latches.
- Lock hood at lower handle and upper latches, remove tagout device from door.