
I. Purpose & Scope
To safely and effectively provide instruction on the inspection and proper use of air monitors.
II. Definitions
Standard PPE – High Viz Garment, Hard Hat, Z-87.1 Safety Glasses, Gloves, Pants, Work Boots
III. Process
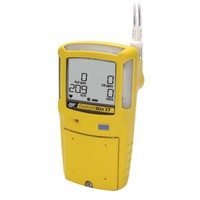
NOTE: Work instruction does not supplement the manual. For specific instructions for the exact model please refer to the owner’s manual.
A. Potential Hazards
- Fire and/or Explosion Hazard
- Burn Hazard
B. PPE
- Standard PPE
C. Inspection
- Inspect for cracks and/or missing parts
D. Use
Activating/Deactivating the Detector
- Ensure the diffusion cover is attached prior to activating the detector to verify the pump is working correctly.
- To activate the detector press the circle button in a safe area that is free of hazardous gas. Attach any pump accessories to the detector prior to activating the detector.
- To deactivate the detector press and hold the circle button until the off countdown completes.
- When the detector is activated it performs several startup tests. Confirm the tests occur.
Bump Test
- Activate the detector.
- Attach the calibration hose to a 0.5 l/min regulator or demand flow regulator.
- Connect the hose quick connector to the pump quick connector on the pump inlet to apply gas.
- The detector should enter alarm. Verify the audile and visual alarms activate, and that the LCD readings match the span gas concentrations of the gas cylinder being used.
- Disconnect the calibration hose from the detector. The detector briefly remains in alarm until the sensors clear of the test gas.
Calibration (Field w/gas)
- Activate the detector.
- Ensure the sensor(s) to be calibrated is enabled in Fleet Manager II
- Verify the calibration gas being used matches the span concentration value(s) that are set for the detector.
- Press and hold the circle button while the detector performs the OFF countdown. Continue to hold the circle button as the detector briefly deactivates.
- The detector then reactivates and performs the calibration countdown. Continue to hold the circle button until the countdown is complete.
- Do not apply calibration gas until APPLY GAS displays, otherwise the auto zero function will fail.
- Auto Zero flashes while the detector automatically zeroes the combustible and toxic sensors, and calibrates the oxygen sensor.
- When auto zero is complete the detector beeps two times.
- When auto zero is complete, APPLY GAS and Auto Span display and a tank flashes.
- Connect the calibration hose to the regulator on the gas cylinder.
- Attach the hose quick connector to the pump quick connector to apply gas. After 50% of the gas is detected on all sensors (within 30 seconds) auto span continues to flash while the detector completes the span (approximately 2 minutes).
- If the sensors have successfully passed the span, the audible alarm beeps and continues with calibration.
- After calibration is complete and the detector returns to normal operation, verify the calibration using a gas cylinder other than the one used for calibration.
- The gas concentration should not exceed the sensor’s detection range. Confirm the LCD shows the expected concentration values.
- To ensure the readings are accurate, apply the verification gas for the same amount of time as was applied to the sensor when it was calibrated.
Calibration (In Office)
- Press and hold blue button until device beeps.
- Wait for prompt, then block inlet with your finger over the air intake nozzle and remove when prompted.
- Wait for system to complete system check.
- Turn on calibration equipment by pressing the far left button.
- Place air monitor in release tabs. Press each side until each side clicks.
- Slide the top tab down.
- Wait for lights to come on, then select Calibrate.
- If calibration passes place a calibration sticker on the monitor with correct dates.
- If calibration fails notify the safety representative.
- Record calibration date and status on the calibration log and on the white board.
E. Maintenance
- Charge detector after every work day, the detector must be deactivated to charge the battery.
- Calibrate the detector before each use.
- Bump test the detector daily.
- Clean the exterior with a soft damp cloth. Do not use solvents, soaps, or polishes.
- Do not immerse the detector in liquids.